Watch out twirly fans! Not only does this lovely Saffron Twirl Dress by Zafarani have great twirl factor, but it has several neat little features about it.
Here is what you get:
clearly written instructions with pictures, suggested fabrics, list of materials needed with yardages, image to place patterns to minimize fabric used, cut list and measurements in standard and metric, numbered pages, separate pattern pages broken down by size and page number (minimizing paper and ink), 1" test square, pattern pieces clearly labeled including designer's name, option to cut on the fold.
EVERYTHING I look for in a fabulous pattern! Because let's face it, who has time to decipher? With 4 kids getting ready to go back to school, time is of the essence!
Let's dive right in......
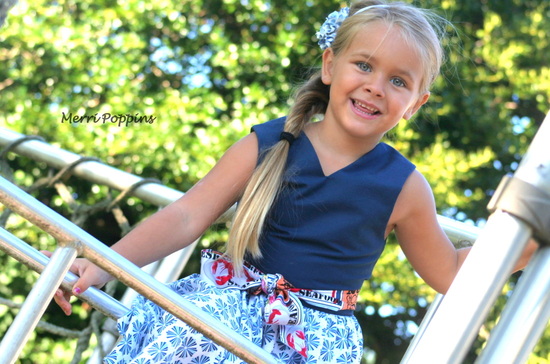
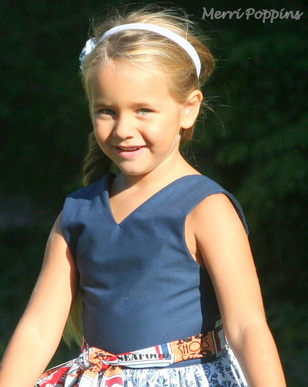
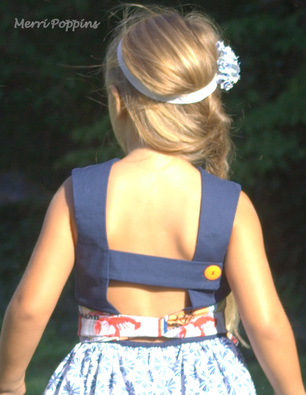
At first glance we notice the V shape bodice.
Here is what you get:
clearly written instructions with pictures, suggested fabrics, list of materials needed with yardages, image to place patterns to minimize fabric used, cut list and measurements in standard and metric, numbered pages, separate pattern pages broken down by size and page number (minimizing paper and ink), 1" test square, pattern pieces clearly labeled including designer's name, option to cut on the fold.
EVERYTHING I look for in a fabulous pattern! Because let's face it, who has time to decipher? With 4 kids getting ready to go back to school, time is of the essence!
Let's dive right in......
At first glance we notice the V shape bodice.
As long as you follow the directions while sewing the bodice together and make sure you clip almost to the stitching, it will be fine. I didn't clip it far enough at first and had to go back and clip it almost to the thread which always makes me nervous!!! But without doing so, it will bunch up and you don't want that.
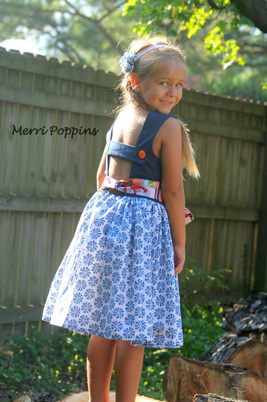
The tie is sewn into the bodice but I'm sure if you would rather leave it off and use as a sash instead, you can. I choose to attach mine as the pattern said. I'm such a rule follower...LOL I did try to be creative with using a printed fabric and have the words going the right way but if I tie it to the back, the words are upside down....oooops! I didn't think about that. There is an option for a shorter length for the tie, too. I made the longer length to be able to wrap it around her and still have a decent amount for a bow.
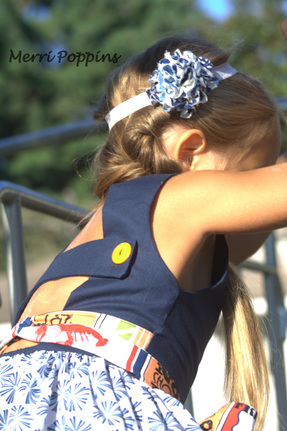
Now, I'm sure you were bound to notice the open back and button closure as you examined my sash!! This is my favorite feature of this dress!!!
| 
|
The closure sits just below her shoulder blades making it comfortable to wear. There are detailed directions on where to place the strap while it's being sewn into the bodice, so no worries there. Moving on to the skirt....it's attached a little differently than most. Encasing the seams is a new technique to me, but it makes a nice alternative for those who don't have a serger. There is a little piece of elastic in the very top of the back of the skirt that helps it fit nicely. Then there is the full twirl factor that every little girl loves. I know mine does!!
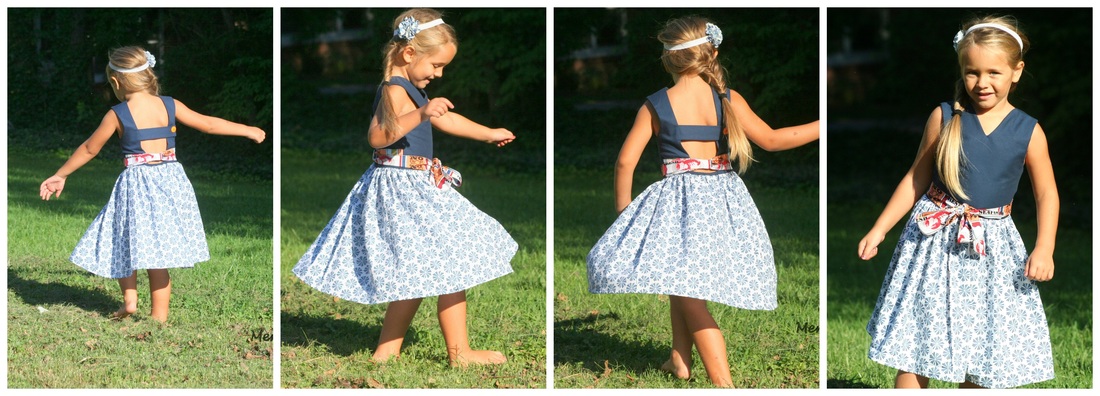
Right now it's still warm enough to still wear sleeve-less, but for those cooler mornings heading off to school I plan on pairing it with a jacket of some sort to extend it's wear. Plus it looks like it will be one of her new favorites!! We all know how hard it is to get kids to not want to wear those favorites when it's 20 below. This is a great addition to your patterns and in a couple of hours time you will have something new!! Happy creating :)
JaNette
JaNette


 RSS Feed